| Cropping Frame in Preview Area |
| |
| You can create scan areas (cropping areas) on the images shown in the
preview area. When you click the [Scan] button, only the areas selected
as the cropping area will be scanned and passed to the application program. |
| |
| You can create two or more multiple cropping areas. When you click the
[Scan] button, you can scan all of the cropping areas you created at once.
(The scanner makes a number of passes corresponding to the number of cropping
areas created.) |
| |
| Cropping frames are created differently according to the document type
selected in [Select Source]. |
| |
 |
 |
• |
The maximum numbers of cropping frames you can create
vary depending on the [Select Source] setting: |
| - |
Platen: 10 |
| - |
Film (Thumbnail display on): 6 (1 per
frame) |
| - |
Film (Thumbnail display off): 30 |
|
| • |
You cannot create additional cropping frames when
you have chosen the multi-crop function with the [Multi-Crop] button
with ScanGear in the Advanced Mode. |
|
|
| Cropping Frame Types |
| |
| Focus Cropping
Frame |
Simple Mode and Advanced
Mode settings are applied to this frame. |
| Selected
Cropping Frames |
The same settings
applied to the focus cropping frame are applied to these frames.
Press [Ctrl] ([Command] in Macintosh) and click the frames to select
multiple frames. |
| Unselected
Cropping Frames |
The settings are not
applied. |
|
| |
| Paper/Photo Selected in [Select Source] |
| |
 |
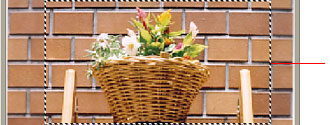 |
Focus Cropping Frame
(Thick and Rotating) |
 |
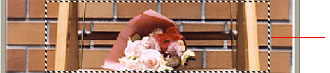 |
Selected Cropping Frame
(Thick and Stationary) |
 |
 |
Unselected Cropping Frame
(Thin and Stationary) |
 |
|
| |
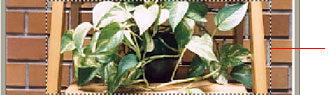
| Film Selected in [Select Source] (Thumbnail Display Off) |
| |
 |
 |
Focus Cropping Frame (Thick and Rotating) |
 |
Selected Cropping Frame (Thick and Stationary) |
 |
Unselected Cropping Frame (Thin and Stationary) |
|
| |
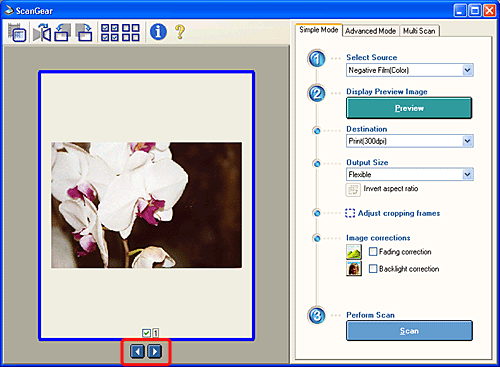
| Film Selected in [Select Source] (Thumbnail Display On) |
| |
| You can only create one cropping frame per film frame. Settings are applied
to the selected film frame. |
| Initial Status of the Cropping Frame |
| |
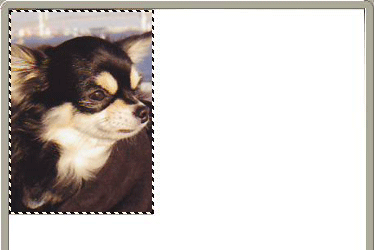
| A focus cropping frame corresponding to the item's original size will
be automatically displayed around the periphery of the image scanned for
preview. |
| |
 |
| |
| Changing the Scan Area |
| |
The mouse cursor will change into the  , ,  , ,  or or  shape
when it is positioned over the cropping frame. If you click and drag the
mouse cursor in the direction of the arrow in this state, the cropping
frame will expand or contract accordingly. shape
when it is positioned over the cropping frame. If you click and drag the
mouse cursor in the direction of the arrow in this state, the cropping
frame will expand or contract accordingly. |
| |
The mouse cursor will change into the  shape
when you position it inside the cropping frame. If you click and drag the
mouse cursor in this state, the entire focus cropping frame will move. shape
when you position it inside the cropping frame. If you click and drag the
mouse cursor in this state, the entire focus cropping frame will move. |
| |
|
 |
• |
The auto crop function, by which the image is cropped
to the selected paper size, is set by default to be on when ScanGear
is first installed.
For details: [Preview] Sheet |
|
|
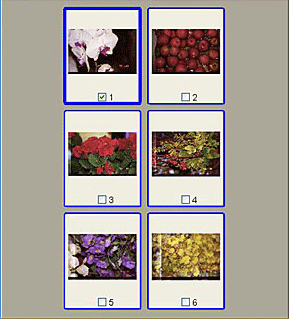
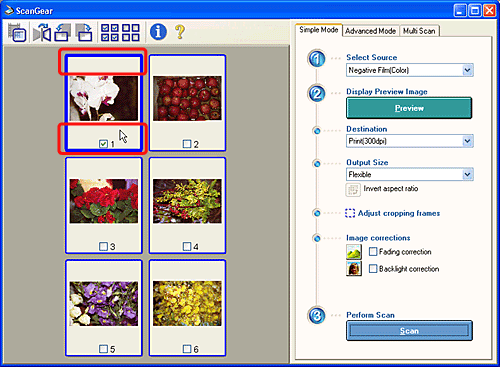
| Film Selected in [Select Source] (Thumbnail Display On) |
| |
| Cropping Frame Types When Thumbnail Display is On |
| |
| Focus Frame |
Simple Mode and Advanced
Mode settings are applied to this frame. |
| Selected
Frame |
The same settings
applied to the focus frame are applied. In Advanced Mode, clicking
on one frame unselects the other frames. Press [Ctrl] ([Command]
in Macintosh) and click the frames to select multiple frames. Click
[Select All Frames] to select all frames at once. |
| Unselected
Frame |
The settings are not
applied. In Simple Mode, you cannot unselect the frame. |
|
| |
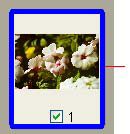 |
Focus Frame (Thick Blue Line) |
 |
Selected Frame (Thin Blue Line) |
 |
Unselected Frame (No Blue Line) |
|
| |
| Selecting the Frames to Scan |
| |
Click the checkbox for the frames you want to scan. Click the checkbox
again to remove the checkmark. To check all the frames, click  [All
Checks] in the toolbar. Click [All
Checks] in the toolbar. Click  [Remove
All Checks] to remove all checkmarks. [Remove
All Checks] to remove all checkmarks. |
| Initial Status of the Cropping Frame |
| |
| A cropping frame corresponding to the detected film size will be automatically
displayed. |
| |
 |
 |
| When [Flexible] is selected |
When [4" x 6" Landscape] is selected |
|
| |
| Changing the Scan Area |
| |
| To change a previously created cropping frame, position the mouse cursor
over the frame. The mouse cursor will change into the , , or shape.
If you click and drag the mouse cursor in the direction of the arrow in
this state, the cropping frame will expand or contract accordingly. |
| |
| The mouse cursor will change into the shape
when you position it inside the cropping frame. If you click and drag the
mouse cursor in this state, the entire cropping frame will move. |
| Deleting Cropping Frames |
| |
| Platen or Film (Thumbnail Display Off) Selected in [Select Source] |
| |
To delete a cropping frame, select the frame and click  in
the toolbar or click [Delete]. in
the toolbar or click [Delete]. |
| |
| In Windows, you can also delete a cropping frame by right-clicking on
the frame and click [Delete]. |
| |
| If multiple cropping frames are present, both the focus and selected
cropping frames will be deleted. |
| |
| Film (Thumbnail Display On) Selected in [Select Source] |
| |
| To delete a cropping frame, click anywhere outside the frame within the
image. |