| Windows: | Click the [Start] menu and select [(All) Programs] –[Canon Utilities] –[CanoScan Toolbox 5.0], and click [CanoScan Toolbox 5.0]. |
| Macintosh: | Open the [Applications] –[Canon Utilities] –[CanoScan Toolbox 5.0] folders, then double-click the [CanoScan Toolbox 5.0] icon. |


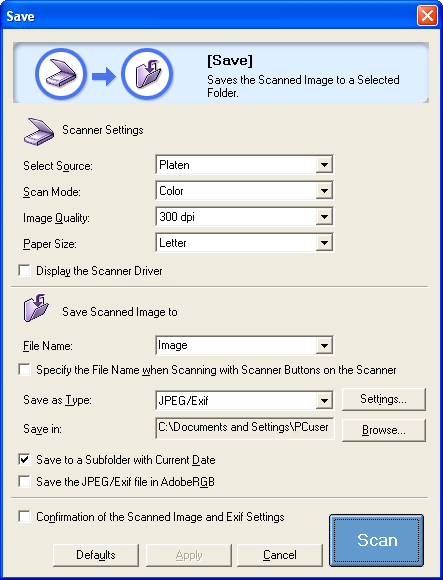


 window
is displayed. Click [Next].
window
is displayed. Click [Next].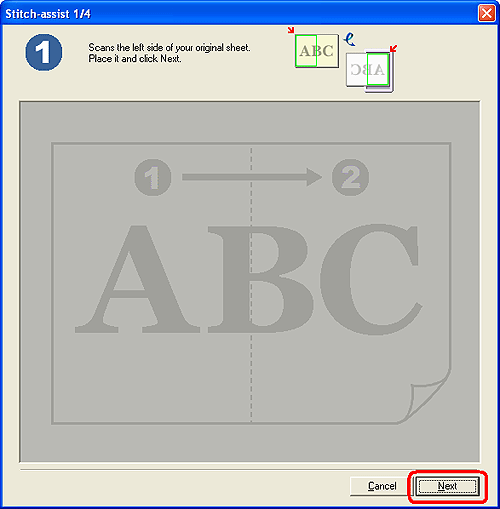

 window
is displayed. Place the right half of the item on the scanner, and click
[Next].
window
is displayed. Place the right half of the item on the scanner, and click
[Next].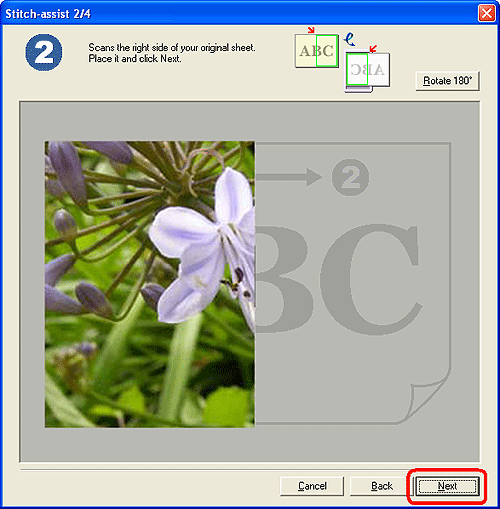

 window
is displayed. Drag the right half of the scanned image to adjust the
position, and click [Next].
window
is displayed. Drag the right half of the scanned image to adjust the
position, and click [Next].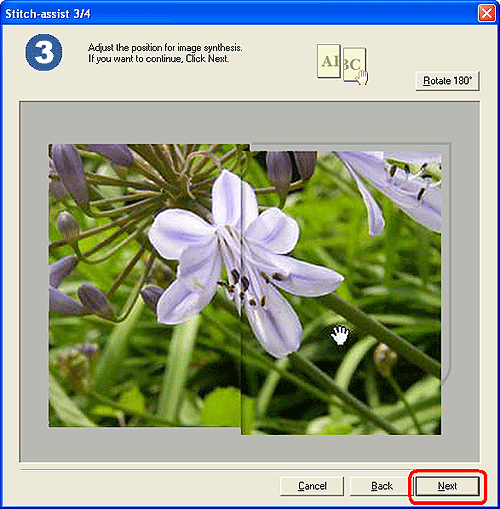


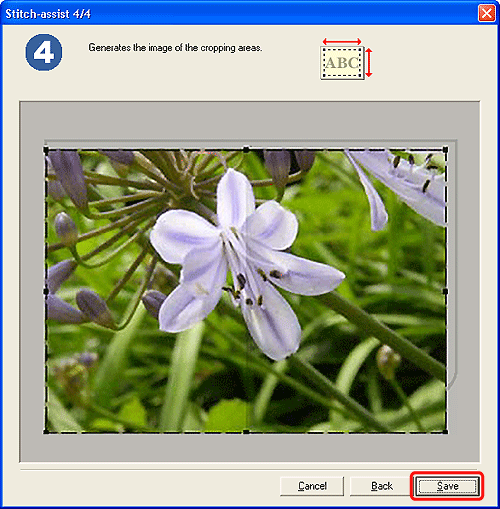
 window
is displayed. Drag the mouse to crop the area to scan, and click [Save]
([Print] with [Copy] function, [Forward] with [Photo-1]/[Photo-2] functions,
and [OK] with [Print] and [PDF] functions). To readjust the position,
click [Back] to return to the step 9.
window
is displayed. Drag the mouse to crop the area to scan, and click [Save]
([Print] with [Copy] function, [Forward] with [Photo-1]/[Photo-2] functions,
and [OK] with [Print] and [PDF] functions). To readjust the position,
click [Back] to return to the step 9.