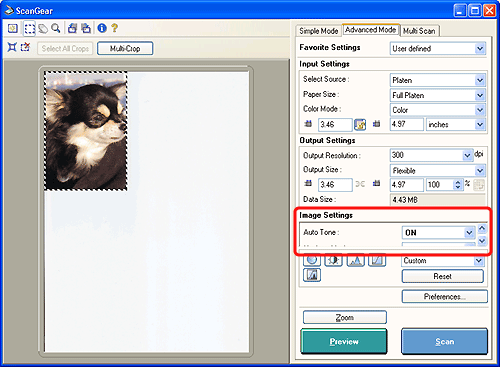
| Image Settings |
| |
| Auto Tone | |||||||||||||||
| Set this function to [ON] to correct the coloration of the scanned image automatically. | |||||||||||||||
|
|||||||||||||||
| Unsharp Mask | |||||||||||
| Sharpens outlines in an image. This function is effective when an image's focus is fuzzy. It enhances the crispness of the overall image. |
|||||||||||
|
|||||||||||
| Descreen (platen only) | |||||||||||||
| Enable this function when you are scanning photos or pictures from print publications, such as books or magazines. Photos and pictures in books and magazines are reproduced as collections of fine dots. If they are scanned without descreening, interference between dots takes place and dark stripes or patterns, called moiré, appear on the image. This function reduces this effect. Note that the preview image is not affected by this function. | |||||||||||||
|
|||||||||||||
| Reduce Dust and Scratches (platen only) | |||||||||||||||
| Dust and scratches on photo prints can sometimes cause white "noise" patterns to appear on images. Use this setting to scan while eliminating this noise to the greatest possible extent. The preview image is not affected by this function. | |||||||||||||||
|
|||||||||||||||
|
|||||||||||||||
| Fading Correction | |||||||||||||||||||
| This function corrects the color and scans film that have faded due to the passage of time or other causes and photos or films with indistinct colors. | |||||||||||||||||||
|
|||||||||||||||||||
|
|||||||||||||||||||
| Grain Correction | |||||||||||||
| Reduces the granular appearance of high-sensitivity films, pushed films and images created from such films as well as films that are scanned at high resolutions. Note that the preview image is not affected by this function. | |||||||||||||
|
|||||||||||||
|
|||||||||||||
| Backlight Correction | |||||||||||||||||||||||
| Corrects film and images that have been shot with reverse lighting. | |||||||||||||||||||||||
|
|||||||||||||||||||||||
|
|||||||||||||||||||||||
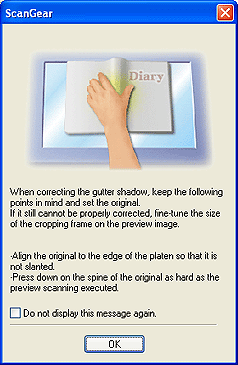
| Gutter Shadow Correction (platen only) | |||||||||||||||||||||||
| Reduces a dark band that appears in the gutter section of an image when both left and right pages of a bound document are scanned. | |||||||||||||||||||||||
| If a preview image is already displayed, the change in this setting will be reflected in the image. This allows you to test this function on the preview image before making the final scan, as the corrected result varies depending on the type of document and how hard you press on the document against the document grass. Blurred or out-of-focus text and line images are not corrected with this function. |
|||||||||||||||||||||||
|
|||||||||||||||||||||||
| When you enable this function, notes on placing a book document on the document glass are displayed. Read the notes and click the [OK] button. | |||||||||||||||||||||||
 |
|||||||||||||||||||||||
|
|||||||||||||||||||||||
| Manual Exposure (film only) | |||||||||||||||
| This function adjusts the exposure data according to the film type. Enable this function by placing a check mark in the box if you intend to process an image with an application program after it is scanned or you wish to achieve an under-exposed or over-exposed effect. Otherwise, the program automatically corrects the exposure data (the exposure level for each RGB channel and compensation levels) to the optimal setting to correspond to the color density of the film. When this function is enabled, the exposure can be corrected in 1% increments in the range 50% to 200%. Enabling this function disables the [Auto Tone] function. |
|||||||||||||||
|
|||||||||||||||
| Apply the tone value to all frames/crops (film only) |
| When the thumbnail display is on, the button category is named [Apply
the tone value to all frames]. When the thumbnail display is off, it is
shown as [Apply the tone value to all crops]. Clicking the [Apply] button reads the color correction data for the selected frame or the selected scan area, and reflects the data onto the other frames. This color correction data will be used for subsequent scans. It will remain in effect until you click the [Reset] button. This function is useful for producing consistent coloration when scanning film shot in the same place. |
| High Quality (film only) | |||||||||
| Enable this function to scan with a higher-than-standard image quality. | |||||||||
|
|||||||||
| Calibration [Execute] Button | |||||||||
| Clicking the [Execute] button starts the calibration process, which adjusts the scanned image to the proper coloration. Calibrate the scanner if the colors in the preview image vary significantly from those in the original item or colors appear in areas that should be white. | |||||||||
|
|||||||||
| Execute at Every Scan |
| When Platen is chosen in the Select Source category and this function is set to [ON], the scanner calibrates before each preview and scan. When Film is chosen in the Select Source category and this function is set to [ON], the scanner calibrates before each preview. |
| Top |